This Website Is for Historical Reference Only
The Impact23 Program went live on July 1, 2023. This website remains available for historical purposes and is intended to inform those seeking background information about the financial system implementation program.
Content on this site is no longer being updated. For current information, resources, and support, please visit the Business & Financial Services website
Concur Basics
Travelers must complete their Concur Profile in its entirety before traveling on official university business. Follow Updating your Concur Profile and review the guidance below to set up or change your personal preferences. To access your profile in Concur Travel and Expense: click on Profile --> Profile Settings. The Profile Options page appears.
-
Concur Access & Login
If you are new to the university, or in a new role, you may need to request access to Concur through your Systems Access Administrator (SAA) before you can use Concur. This process usually takes a full business day to complete. Remember, your department determines the right Concur access for you. Navigate to R'Space through portal.ucr.edu, then select the Authorized Apps tab. Concur will be located in the grid. Use your UCR NetID to login through Multifactor Authentication (MFA / DUO Mobile).

-
Concur Delegate Information
Request & Expense Delegates (Email Settings)
Emails to Concur Delegates are controlled by the Receives Emails and Receives Approval Emails settings on the delegate assignment under Request/Expense Delegates.
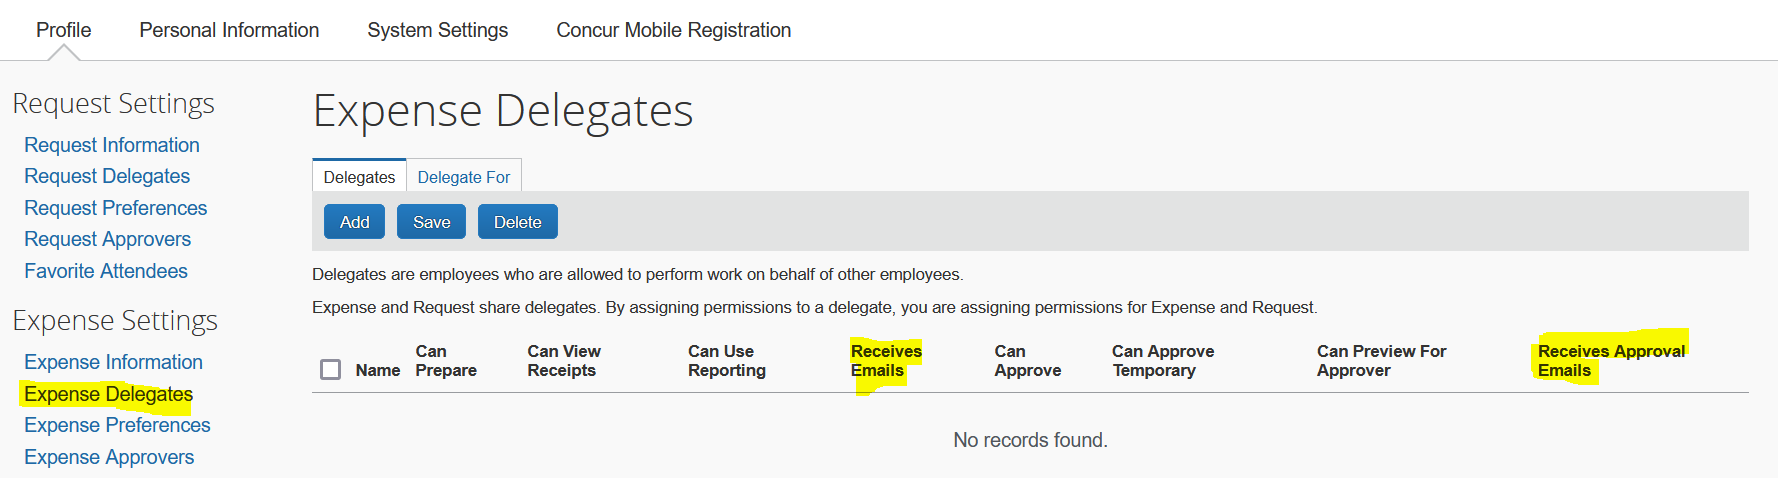
Concur Delegates will receive the following emails when Receives Emails is checked:- workflow status change notifications (i.e. when a report is returned for correction)
- email reminders
- image received notification
- new company card transactions notification
View Who You are a Delegate For
- Go to Profile, then Profile Settings
- From the Request or Expense Delegates page, select the ‘Delegate For’ tab.
- Review the people you have been granted delegate status and what permissions you have been granted.

Acting as a Delegate
- On Concur homepage, click Profile (top right).
- Select Act on behalf of another user – search the name of the person you are a delegate for.
- Click Start Session.

You can now see at the top right corner the name of the person you are Acting As

-
How to Act as a Delegate
Concur Delegates are assigned for travel, non-travel, and PCard expense report processing.
-
Select the Profile menu in the upper right corner.
-
If you have been assigned as a delegate for someone, you will see the Acting as other user section.
-
To act on behalf of someone else:
Use the dropdown to search for and select the individual on whose behalf you need to act. Then, click Start Session. A green box will appear in the upper right corner of your screen, displaying the name of the individual on whose behalf you are acting.
Note: You will only be able to locate those individuals who have identified you as their delegate. -
You will also only see the areas you can access on the individual’s behalf. If you are a delegate, you can access the Expense tab. If you are a travel arranger, you can access the Travel tab. If you are both a delegate and a travel arranger, you can access both tabs.
-
To end your delegate session:
Select the Acting as other user menu (green box in the upper right corner of your screen) and click Done acting for others.
-
-
Profile Information & Travel Settings
Travelers must complete their Concur Profile in its entirety before traveling on official university business. Follow Updating your Concur Profile and review the guidance below to set up or change your personal preferences. To access your profile in Concur Travel and Expense: click on Profile --> Profile Settings. The Profile Options page appears.
You can update information, such as personal information, contact information, email addresses, and travel preferences. You can view the approvers of requests and expense reports, adjust system settings, activate e-receipts to use in expense reports, and download the Concur mobile app to capture receipts on the go. This guide is not comprehensive; it is meant to communicate the most commonly used Concur profile features and to facilitate timely approvals and travel reimbursements.
Notes: 1) It is highly recommended that you verify your email address, validate your legal name for air travel, and enable e-Receipts
2) You also need to update your travel preferences.This guide covers the following topics:
- Updating your information
- Updating request and expense settings
- Updating system settings
-
Request & Expense Information
Completing the Request Information & Expense Information is optional. If you consistently use the same department chartstring for travel and route requests/expense reports to the same Financial Approver, then entering request and expense information can reduce the chance of inadvertently entering an incorrect COA on a request/report and expedite the expense reconciliation process. We do not recommend enabling a default COA for expenses if you use various department funding sources for your University business travel and entertainment expenses.

-
Register with Mobile Apps
Access Concur from your mobile device with Concur Mobile. You can also organize all aspects of your travel with TripIt Pro. Visit our Mobile Apps web page.